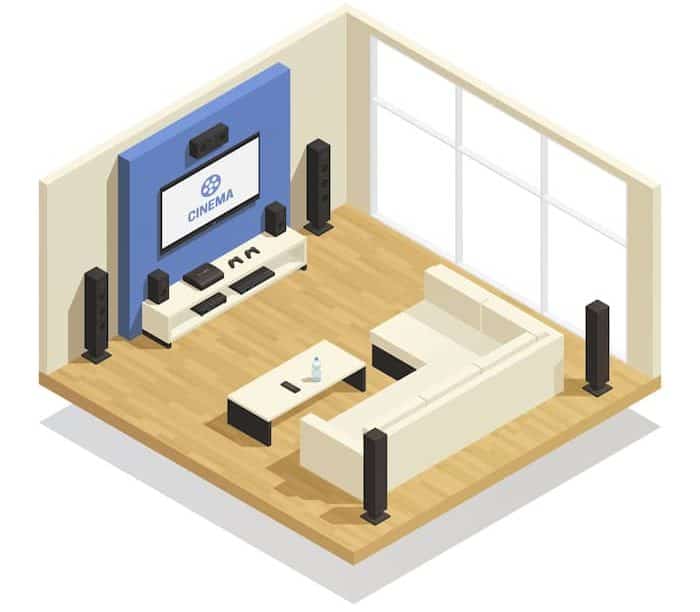
How To Connect a Microphone to Home Theater
If you have a home theater, watching movies is a great way to unwind after a long week of work. Besides binge-watching, another activity you can enjoy is setting up karaoke and singing your favorite song with your family. However, connecting a microphone to your home theater can be tricky sometimes, especially if you’re not tech-savvy.
Here’s how to connect a microphone to your home theater:
- Decide what microphone to use.
- Turn off your system before plugging in.
- Plug the microphone into the AV receiver.
- Turn on the system and the microphone.
- Adjust the volume.

Having a karaoke session is truly enjoyable, especially with your family and friends. Read on if you’re looking for steps on how to connect a microphone to your home theater. I’ll discuss the steps above and guide you on how to set up your home theater system.
Also read: Will an Amazon Fire TV stick work with a Projector?
How To Connect a Microphone to Home Theater?
Turn off your home theater system before plugging the microphone into the AV receiver to connect a microphone to your home theater. Once plugged in, turn on the system and test the mic to ensure it’s working properly. Adjust your system settings to enhance the sound quality and regulate the volume.
Be mindful of the distance between your microphone and the loudspeaker.
If you set up the system correctly and hear a screeching sound coming from the speaker once it’s powered on, you’ll need to move the microphone further away. This sound is due to microphone feedback, which is a positive gain loop between both devices.
1. Decide What Microphone To Use
Whether you have a mic in stock or plan to buy a new one, knowing what microphone to use is essential to set up your system correctly.
There are 2 types of microphones you can choose from:
- Wired microphones. These are more common than wireless models. They’re easier to set up and usually cost less. However, wired microphones aren’t the best choice if you’re not a fan of long cords lying on the floor. The advantage of using a wired microphone is its reliability since you don’t have to worry about sudden signal drops. It’s easier to set up and comes at an affordable price.
- Wireless microphones. These are more flexible since they allow users to move freely around the room than their wired counterparts. With this said, you won’t have to worry about tangled cords lying on the floor, creating a tripping hazard.
If you’re looking for an affordable and high-quality microphone you can use, a wired microphone that’s easy to set up and uses an XLR Connector. It’s excellent for both vocal and instrumental applications.
2. Turn Off Your System Before Plugging In
It’s always best to turn off your system first before you plug in your microphone. By doing this, you can prevent your loudspeakers from getting damaged.
Loudspeaker damage is expected when your system is turned on then you plug in your microphone. A loud pop usually comes after you plug in the microphone, and the sound is worse if you accidentally place your mic near the speaker, which will cause feedback.
To avoid such problems, make sure to turn off your system or, at the very least, turn down the volume completely before connecting your mic.
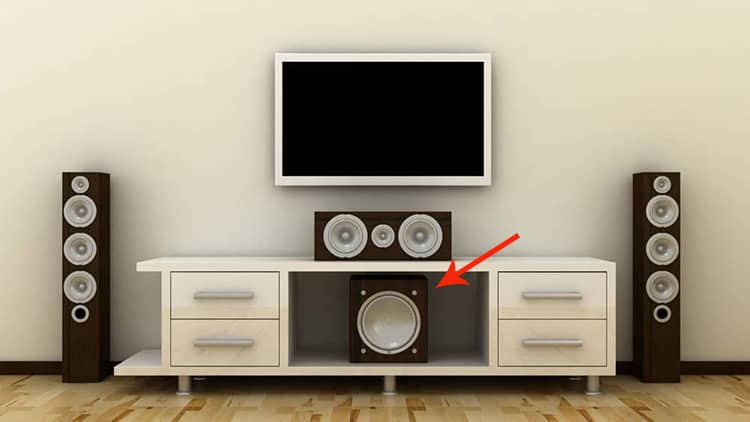
3. Plug the Microphone into the AV Receiver
Once the system is turned off, you can plug the microphone into the AV receiver. Follow the steps below:
- Locate the microphone port in the AV receiver. This is usually labeled as “mic in” or simply “mic.”
- Grab the microphone jack and plug it into the port. Gently give the jack a push to ensure that it’s pushed all the way into the port.
- Connect the base to the AV receiver and a power source instead of plugging in the microphone cord. Follow the manufacturer’s instructions for complete setup instructions.
Once you’ve finished connecting the microphone, you may now proceed to the next step.
4. Turn On the System and the Microphone
After plugging in the microphone jack or base, you can now turn on the system and mic. Once both devices are turned on, test the mic and see if it’s working correctly.
Speak into the microphone and see if the sound is coming out of the loudspeaker. If you don’t hear your voice coming out of the speakers or hear static or crackling, that means you might not have plugged the jack correctly.
Ensure that it’s completely connected and check that it’s plugged into the right port, as discussed in step 3.
5. Adjust the Volume
Lastly, adjust the system settings based on your preferences. Try to play around with the volume until you’re happy and satisfied with how loud it is.
While it’s fun to sing with the volume turned up, it’s safe to keep it on a normal level to prevent damage to your loudspeaker (and your ears). Furthermore, you don’t want to upset your neighbors by playing audio too loud.
Although speakers can produce incredibly loud sounds, it’s not designed to play audio too loud. Turning the volume to maximum could cause heat in the drivers, resulting in speaker damage. Because of this, it’s best to keep the volume at the mid-level to avoid mechanical failure, especially if you’re using it for karaoke.
Speaker repairs can be costly, so it’s best to avoid putting too much pressure on them.
Conclusion
Setting up your home theater for karaoke can be challenging if you’re not familiar with the steps to connect your microphone. There are several steps you need to follow to make sure your mic is working correctly.
Whether you’re using an old microphone or buying a new one, it’s important to know which suits your preference. To prevent damage to your loudspeaker, make sure to turn off the system first before connecting the microphone. Once it’s plugged in, turn on the system and test out your mic. Now your home theater is ready for karaoke night!
Also read: What Does PMPO Mean in Home Theater?