Projection on Wall vs Screen- Which is Better?
If you’re setting up a home theater room with a video projector, you might consider whether it’s worth investing in a projector screen too. Or would a plain white wall work just as well?
The main difference between projection on a wall vs a screen is in the image quality. The image you project on a wall will not be as bright, clear, and accurate to color as that of a projector screen.
Also read: Can You Use a Sheet as a Projection Screen?
Projection on Wall vs Screen – Which is Better for a Home Theater Room?
While the screen does beat the wall when it comes to projected image quality, using a bare wall may work better for your budget and requirements.
And you can always enhance the quality of the projected image on the wall by using special high reflectivity paint.
So which one should you go for: wall or screen? In this article, we’ll explore the pros and cons of projecting on screens versus walls to help you decide between the two.
We’ll examine the advantages and disadvantages of each and describe the different options available to you.
What makes a projector screen work better than a wall?
Projector screens are designed specifically to give you the best possible image from your projector. Their surfaces are smooth and uniform, so the image has no distortions.
Projector screens have a special coating that increases their ability to reflect light and thus produce a brighter image.
Is a projector screen worth the investment?
Yes, if you want to get the best viewing experience out of your projector. And it works out pretty cost-effective in the long run.
Investing in a screen is a one-time investment. Whereas if you were to use a white wall instead, it would require more maintenance.
Walls don’t reflect light as well as screens and if you look closely, even the smoothest looking wall will have crevices and bumps. This can create tiny shadows and make your image look distorted.
In order to make your wall image comparable in quality to the screen, you would have to invest a lot of time and effort in making the wall smooth. That includes buying projection paint and putting in the effort to sand, prime, and paint the walls.
Walls can also get dusty, and wear and tear is more. With most projector screens, all you need to do is roll them up when they are not in use. Screens also come priced in different ranges, so you can buy what best suits your budget.
How much do projector screens cost?
Screens come in different price ranges, from as low as 25 dollars to high-end ones over 4 grand. But you can get pretty decent ones for around 200 dollars.
What are the disadvantages of using a screen?
Projector screens come in limited sizes while with a wall you are free to keep the image size as big as you want.
Installing the screen would require some additional equipment and accessories such as poles and beams, mounting brackets, projector mounts, cables, and remotes, which can add to costs.
Sometimes frequent rolling up and down of cheaper screens can cause bends.
What are the different types of projector screens available?
Projector screens come in different price ranges and with different set-ups depending on your requirements. They can be mounted on the wall, ceiling or floor. Some are even portable. Here are a few of the most common types
Permanent screens or Fixed Frame screens
These are among the most expensive, high-end screens. The quality of the image projected is superior to other types of screens.
You’d use these screens if you have a permanent place for your home theater as they are fixed in one place and cannot be rolled up and down. Invest in these for the ultimate home theater experience.
Pull out/ semi-permanent screens
These are screens that can be pulled out when in use and rolled back neatly when done. They can be mounted on the wall, ceiling, or floor. They are semi-permanent but can also be easily dismantled.
There are both manual and electric pull out screens:
Manual screens are cost-effective and low maintenance. They are similar to the screens you see in classrooms or conference halls and can be a great addition to the home theater. They usually have a pulley or string which helps you pull the screen up and down.
Electric screens are remote-operated screens that can be mounted on the floor, ceiling, or wall. They’re great if you’d like to make a permanent home theater set up and give your home theater a stylish, professional look.
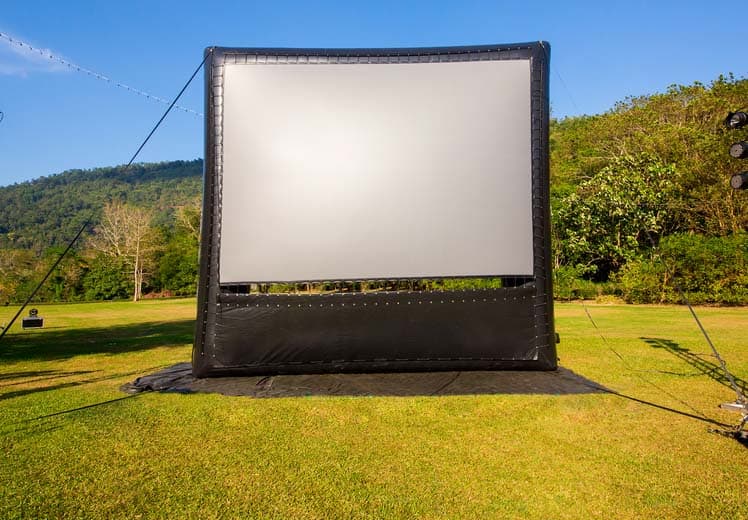
Portable Projector screens
Tripod Projector and floor rising screens are examples of portable projector screens. They are portable and are best used for a makeshift home theater setup.
For instance, if you need to use it for purposes other than your home theater or if you live in a rented house and can’t make permanent changes to it.
However, the quality of the image is not so good and they can be cumbersome to move around.
Can I use my wall instead of a screen?
Yes, you can use a solid white wall for projection but the quality of the image displayed will not be as good as a projector screen.
You can, however, improve the quality by smoothening it and using projector paint to improve its light-reflecting properties.
What are the advantages of using a white wall?
White walls are good if you are on a budget and if you are tight on space.
And if you have a projector with higher brightness (2000 lumens light output or more) you’ll get a fairly good image. Less ambient light in the room or a dark room also helps achieve a good result.
What are the disadvantages of using a wall?
Walls do not reflect light as well as a screen. The texture of the wall can affect the image quality. Bumps and cracks on the wall can cause shadows which could distort the image.
In order to improve the image quality, you’d have to invest more time, and effort to prepare the wall and paint it with projector screen paint.
So it might be easier and ultimately more cost-effective to go with a projector screen instead.
How do I Convert My Wall into a Screen?
Here are some steps you can take to convert your wall into a screen:
Step 1: Prepare the wall: You need to make the wall as smooth and even as possible to remove any flaws that might warp the picture or create tiny shadows.
Turn your lights off and shine a torchlight on the wall to look for small cracks and bumps. Mark out the areas that need to be smoothened up or filled.
Use sandpaper or a power sander to sand the area with rough spots. You might need to fill or patch any small holes in the wall. Use a cloth to wipe away the dust. Next prep your wall with paint primer and leave it to dry.
Step 2: Decide on the screen size: First install your projector to see what dimensions of the screen size you want.
Turn the projector on and using the image as a guide, mark an outline of the area in which you want the projection to be with a light pencil or painter’s tape.
Based on the type of projector and the size of your room, you can calculate the size you want. Here’s a website that can help you calculate the size of the projection.
Step 3: Paint it with projector screen paint: Screen paint is highly reflective and will make the image look brighter. Screen Goo, Paint on Screen, Digital Image Ultra White High Definition Screen Paint are some examples of screen paint.
Step 4: Create a border frame- creating a border frame in a contrasting color such as black will help define the image and increase contrast. You can use black velvet projector screen tape.
Or you can paint the wall around the border in non-reflective paint in a darker color than you’ve painted the screen. Use painter’s tape to mark the border and prevent the paint from running.
What color should I paint my wall?
If you’re using projector screen paint, white isn’t always the obvious choice. If your projector produces more than 3500 lumens, you should go for grey as white would produce a very bright image.
Grey will give you a good balance of brightness and contrast. You can choose a white-grey or a light grey with a satin finish.
But if your projector is low budget and dim, a white wall will work better as it reflects the most light and will give you the best possible result. However, the image quality will not be that great and the image will look dull with low contrasts.
Black is not a recommended color. Though it can give good contrast, unless you have a very powerful, expensive projector, the image too would be dark.
Conclusion
Now that you know the differences between projection on a projector screen versus a wall, you can weigh the pros and cons to see what best suits you.
To sum up, if you want to get the best out of your projector I recommend you opt for a projector screen.
Using a wall is okay for a makeshift arrangement, but if you want a high-quality viewing experience, using a screen that is specifically designed for a projector is the ideal choice.
If you do decide to project on a wall, I suggest you use projector paint to enhance the image display. Ultimately, it depends on what your specific requirements are and how much time and money you are willing to spend.
Also, check out my recommended projector screens.
References:
https://www.lifewire.com/are-projector-screens-necessary-5207204
https://www.bhphotovideo.com/explora/home-entertainment/buying-guide/projection-screens-buying-guide
https://www.projectorscreen.com/store/pg/40-Types-of-Projector-Screens.html
https://www.projectorpeople.com/resources/lumen-guide.asp
https://www.apartmenttherapy.com/everything-you-need-to-know-to-140317
https://pointerclicker.com/what-is-the-best-color-to-paint-a-wall-for-a-projector/
https://www.nytimes.com/wirecutter/reviews/best-projector-screen/#why-you-should-trust-me